Import
Introduction
We cannot apply the data from ViconIQ directly to a rigged character; therefore we need import the data from Vicon (V and VSK files) into Autodesk's MotionBuilder, process it and apply it to a rigged character. The pipeline process is fairly simple, as long as everything is setup correctly. The first step in the process is to import the animation, the pipeline for which is shown below (this pipeline applies to MotionBuilder 7.5 ext2, with the ViconGP Import Plugin; for other versions the process is slightly different)
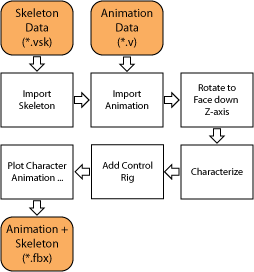
Step 0: Start MotionBuilder - Open MotionBuilder 7.5, and make sure you have a new (empty) scene
Step 1: Open Importer - Under the Top Menu, go to Open Reality -> Tools -> ViconGP Importer
Step 2: Check Options - For importing the skeleton, make sure the following are checked:
- Always create models
- Force start to zero
- No Animation
- Import Skeleton(s)
- Remove LAO
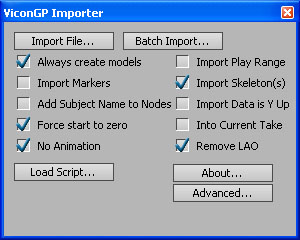
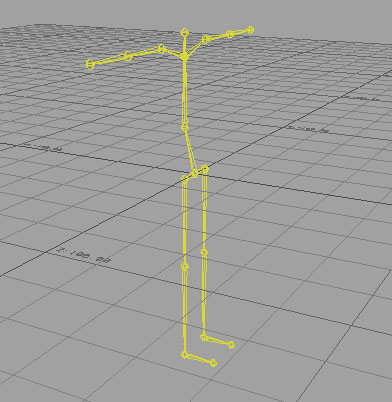
Step 3: Import File - LMB Click Import File.... and find the Vicon SKeleton (*.vsk) file you want to import; Click Open. This should load a skeleton into MotionBuilder view space
Tip: If you wish to have keyboard controls as with Maya you can selcet from the Top Menu, Settings -> Keyboard Configuration -> Maya. Then you can use Alt-Mouse to change the view
Step 4: Check Options - For importing the animation, make sure the following are checked:
- Force start to zero
- Import Skeleton(s)
- Remove LAO
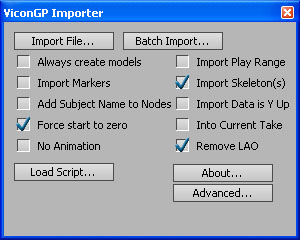
Step 5: Import File - LMB Click Import File.... and find the Vicon Animation File (*.V) file you want to import; Click Open. This should load the animation into MotionBuilder (we can see that it has loaded as the skeleton has shifted to a more relaxed posture); once this has completed you can close the Importer.
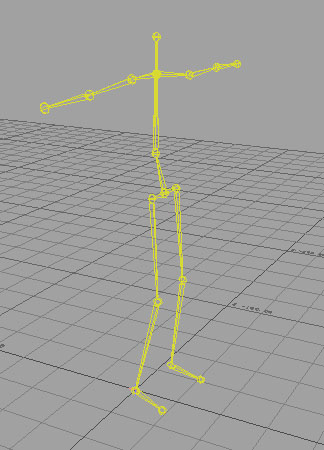
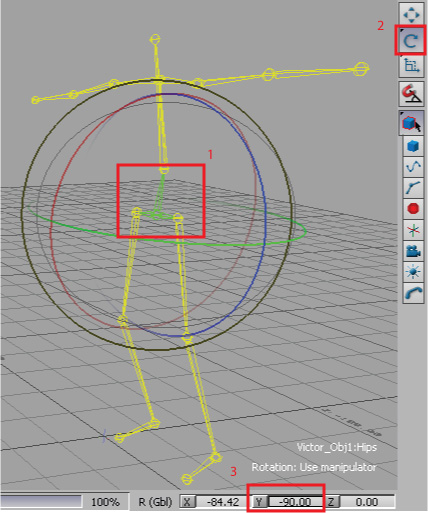
Step 6: Rotate Skeleton - An important step is to rotate the character around so that it is facing down the Z-axis; without this step things will not work properly. In order to do this, Select the Root Node, then make sure you are in Rotation Mode, and then Rotate the Character around until it faces down the Z-axis (or you can type it in), generally this is a -90 degree rotation around the Y-Axis.
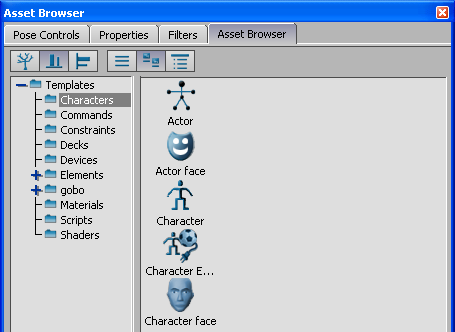
Step 7: Characterize - Click on "Asset Browser", open "Templates", and Select "Character" - drag this icon to the character in the window and apply it to his root node (make sure you hit the root node otherwise it will characterise, but not properly). It will ask if you wish to make the character a Biped or a Quadraped (obviously we should select "Biped").
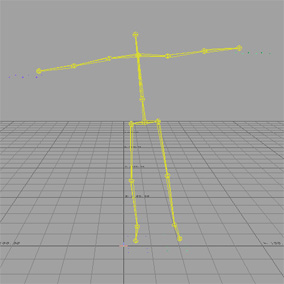
Step 8: Control Rig - In order to apply a Control Rig, go to the Navigator Window and Click on the Navigator tab. Under this you need to expand Characters and then double-click on Character. Under the Character Definition tab, we shall see Control Rig, press the Create button. It will prompt us for either creating an FK/IK rig or just an IK rig, press the FK/IK button. This should apply the control rig to the character, there is a small difference (small green and purple dots should appear around the hands, as should below:
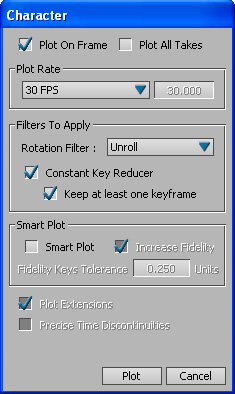
Step 9: Plot Control Rig - Finally, we need to plot the animation we have to the Control Rig; go to the Navigator Window and Click on the Navigator tab. Under this you need to expand Characters and then double-click on Character. Under the Character Settings tab, click Plot Character..., from the opened dialog box click Control Rig and then we shall be prompted with some options (as shown below), accept the defaults and press Plot and the character should appear with a clear control rig attached to the skeleton
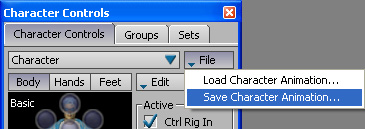
Step 10: Save Animation - Once we are done, we need to save only the animation. In order to do this we go to the Character Controls window, and then make sure we have the character selected (see below), then we click File and then Save Character Animation... Select an appropriate name and place to save your animation.
