Setp-by-Step
Calibration
Overview
The calibration stage essentially links the cameras to the real environment (including each other). The main purpose of the calibration stage is to create a relative 3D reference for each camera so that each camera has a its own reference in 3D space relative to the other cameras; in addition we reference the relative distances of the camera with the world origin as it is in the actual room.
The calibration stage comes in two key parts: The Wand Wave and Setting the Origin
The Wand Wave
The Wand Wave is used to position the cameras relative to each other; in order to do the wand wave, you can think of the process as "Painting a Room" whereby you paint both the inside and outside of a set of invisible walls (as marked out by the black tape on the floor). The process is as follows:
- Click on the Calibrate top-tab
- Click on the Camera view and press All in order to bring up all the cameras (in this view, once you start to calibrate you will see the movement and history of the wand)
- Collect the 240mm Wand from the drawer and have a colleague stand in the centre of the room with the wand (if you are doing this alone, you just need to have the wand in hand and make sure only the wand is reflecting)
- Select the 240_mm_Wand from group "1. Calibrate Cameras", select Full Calibration and press "Start Wand Wave"; once pressed your colleague should start to paint the room (as shown in the video below), the entire process should take between 5000 and 8000 frames (approximately 42 seconds - 66 seconds)
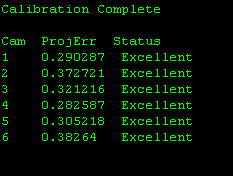
- When the sequence has finish press "Stop Wand Wave"; the system will then go through the calibration process and position the cameras in space (you need either Excellents or Awesomes, if you do not get all cameras with these two responses then you need to redo wand wave again)
- Once the process has completed, it should give you a response as to the error margin overall

A video of the wand wave is shown below:
Setting the Origin
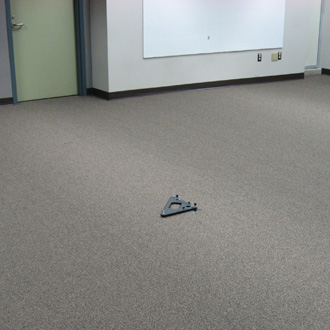
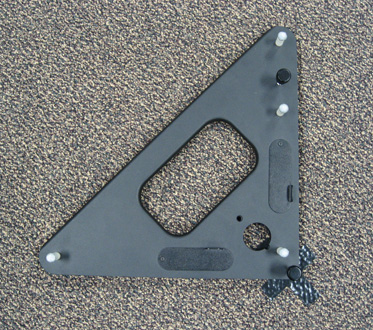
- Place L-Frame ~ Place the L-Frame in the centre of the room; the 90° corner should be placed on the cross; the opposite side should sit along the Z-axis (in a right-handed system) and adjacent side should be placed on the X-axis (as shown below)
- Level L-Frame ~ Level the L-Frame using the two screws and the spirit levels (close the little windows for the spirit levels when it is level)
- Set Origin ~ Under ViconIQ in the 2. Set Volume Origin and Axes group, select Ergo_9mm_LFrame press Track L-Frame and the system should ask you to set the origin (if it doesn't then it means that it cannot see the L-Frame properly, at least by a sufficient number of cameras) and then press Set Origin
 |
 |
Wand Wave, Tips and Tricks
- Result: Firstly, the goal is either "Excellent" or "Awesome"; anything else really requires the process to be repeated; this is because the amount of distortion for "Good" or less is too high and will result in poor accuracy later on.
- Wand Movement: The wand should actually be slightly loose in your hand, do not hold it tight, but let it rotate slighty so that whilst you are going up and down, the want is actually rotating around in your hand (say between 180 and 360 degrees every couple of strokes).
- Speed: Try and maintain a steady speed, 6000 frames, at 120fps, is about 50 seconds (or 25 seconds per room side - inside then outside), with 4 walls, this should take about 6 seconds per wall; try not to rush it, too fast and the wand becomes a blur for the frame.
- Distance: As discussed in the introduction section, the near focus for the cameras is approximately 1m away, less than that and the marker will be blurred, with the space you should be at least 2m away anyway, but less than 1m will cause problems.
- High/Low: In order to obtain the entire virtual space, it is a good idea to "nearly" (not actually) touch the ground with the wand, and stretch as a high as you can with the wand. The system is setup to capture about 2.5m above the ground, so extending to that space is essential to make sure all markers are seen properly.
- Clothes: At any stage when the cameras are capturing data, whether it is for calibration or subject capture, we need to minimise the data. Therefore, even though we are not capturing a person, the markers are not on the person doing the calibration, and the wand is set to a specific distance it is advised to make sure the person doing the capture is not reflective (white t-shirts, sweaty brow, etc) or wearing anything reflective. This will avoid the cameras mistaking a random reflection for the wand (as described above, the main aspect is the relative distances of the markers, not the actual distance from end-to-end).