Step-by-Step
Import into Maya (2011+)
Introduction
Once we have the FBX file that was exported from Blade, we should have enough information to apply the animation to any animated character - the only issue we have is that we need to setup the character in a way that allows us to "retarget" the motion capture animation onto that character
Warning: This section refers to importing Vicon motion capture data into Maya 2011 and greater where the standard retargeting has been removed and replaced with the HumanIK system. If you are using a version prior to 2011, the other section dealing with importing to Maya should be followed.
Required Plug-ins
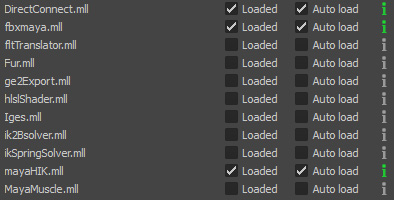
Make sure that the plugins for HumanIK and the FBX Importer have been loaded
- [Menu] Window → Settings/Preferences → Plug-in Manager
- Check the box for "Loaded" for:
- fbxmaya.mll (FBX Importer)
- mayaHIK.mll (HumanIK)
Overview
In order to apply the animation to a character in Maya, a properly setup character is required (specifically the rig); once you have setup the rig for a character, bound the rig to the mesh, and made sure the bind weights are properly set, an animation (even an IK animation) can be applied to the skeleton. Motion Capture data needs to be retargetted, this is because the skeleton animation from the motion capture is proportioned differently to the target character - rather than resize the character, we simply retarget. The retargetting using Maya's HumanIK system relies on appropriately named joints; in Maya this can be setup ahead of time during the character creation process. The steps for retargetting an animation are as follows:
- Setup Target Character (Map Joints, Characterize, Apply Control Rig)
- Import Animation
- Orientate the Skeletons
- Setup Source Skeleton (Map Joints, Characterize, Apply Control Rig)
- Retarget Animation
Setup Target Character
The first step is to name each joint accordingly; Maya labels the joint based on the Joint/Socket of the bone, rather than the bone. Therefore a leg becomes a Hip (because that's the joint), etc.
- Open Maya
- Load in your Character (that has been rigged, bound, and weighted properly)
- Open the Outliner
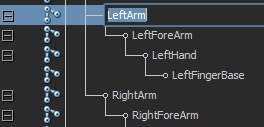
- Check the name of each joint (the full list is as follows, according to the hierarchy)

We can simply rename a joint by double clicking on it, and renaming it
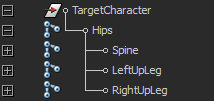
To make our life easier, we can add the target character to a group node; this helps when importing the animation
- Select the top node "Hips" in the Outliner
- [Menu] → Edit → Group
- Rename the group to "TargetCharacter"
Import Animation
Next we need to import the animation from the FBX file; first we need to properly set the import options:
- Under the Menu → File → Import... (Options)
- Set the global preferences as below
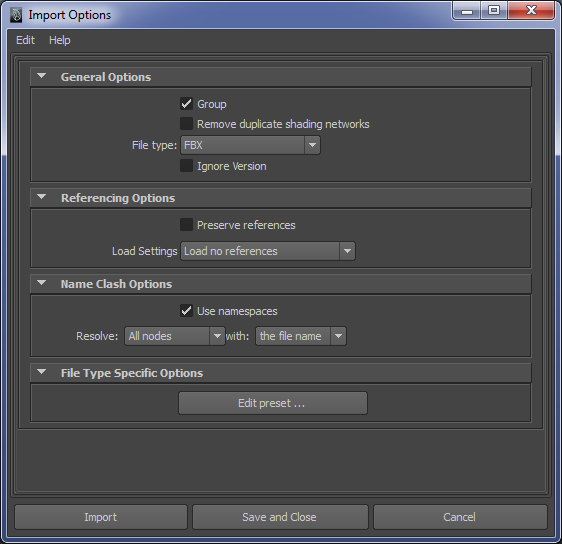
- Once these have been set click Edit preset ...
- Set the FBX preferences as below:
- Save the preset (e.g. "Vicon FBX Import")
- Once back on the previous window, click Import
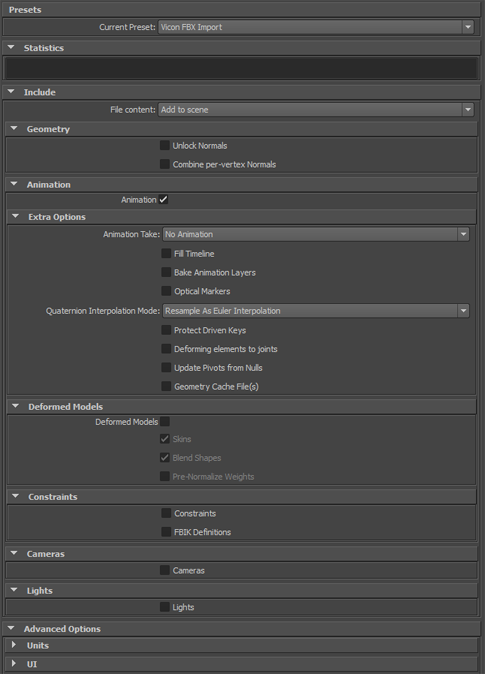
- Once back on the previous window, click Import
- Find the FBX file, and click Import
- Select the root node of the Target Character and rotate it to face the same direction as your imported skeleton if it doesn't match
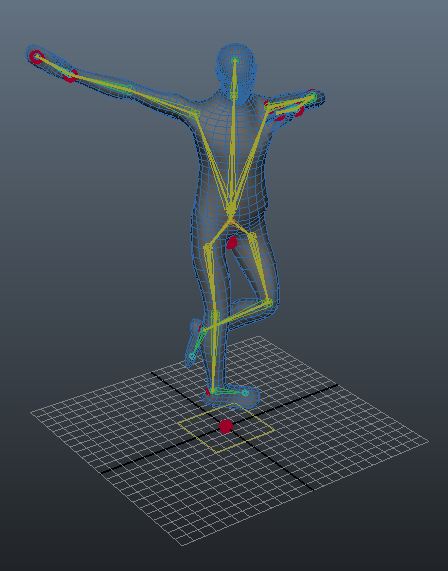
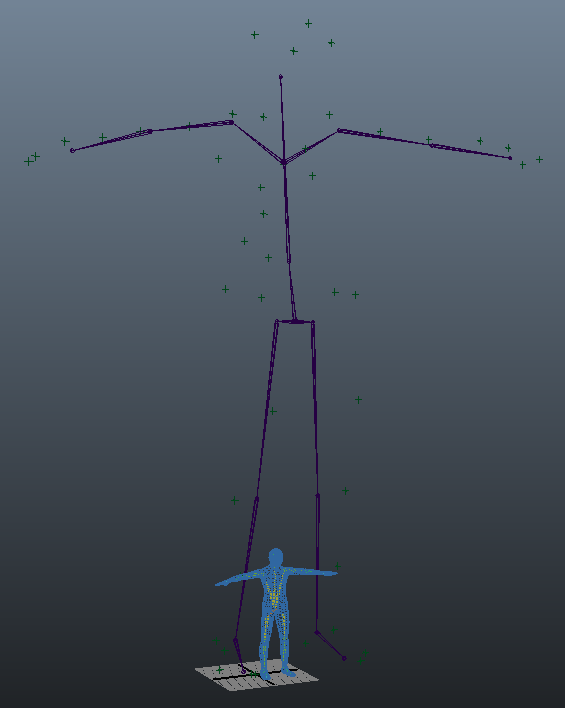
- If the skeleton + animation imported correctly, it should appear in your viewport similar to what is shown below
Setup Source Skeleton
Next we need to clean up the imported data
- Go to the Outliner and select all the "Locators", these are the optical markers, and press the Delete key on the keyboard (they are no longer useful)
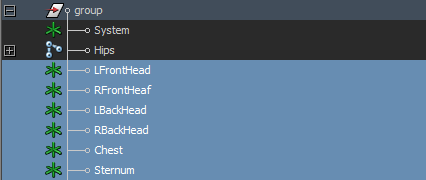
- Select the group node, and rename it to "SourceSkeleton"
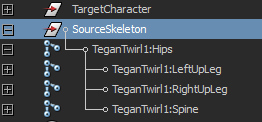
Characterizing the Characters
Using the HumanIK system we are going to characterize our "Target Character" and then apply the same process to our Source Skeleton.
- Switch to Animation Mode (if you are not already in it)
- Open the HumanIK Dialogue, [Menu] → Skeleton → HumanIK ...
- Under the "Characterize" tab, Click New
- Under the "Name:" entry, type "Target"
- Select the root node (or hips) of your character
- Click "Auto-Set All from Selection" (note: any joints which did not set correctly due to naming, can be done manually)
- Click "Characterize" (check that it gives the message "Target was Characterized Successfully")
Repeat the above section for the Source Skeleton, but with the following changes:
- Under the "Name:" entry, type "Source"
- Due to the namespace, the "Auto-Set All from Selection" will not work; instead the following mapping procedure must be followed:
- In the Outliner, select the Hips from the Skeleton (e.g. TeganTwirl1:Hips)
- Under the "Base(Required)" Section entry for Hips, click Set; that joint should appear under that section
- Repeat for all joints
Creating a Rig
The following is only necessary for the Target Character (it will not work anyway on the Source Skeleton)
- Click "Create Rig" (check that it gives the message: "New Rig: Target_ControlRig was created")
Retarget Animation
The final stage is to set simply retarget the animation
- Select the Character Pipe tab
- Make sure the Character is set to Target
- Set the Retarget Input: to Source
- Press the Apply Retargeting button
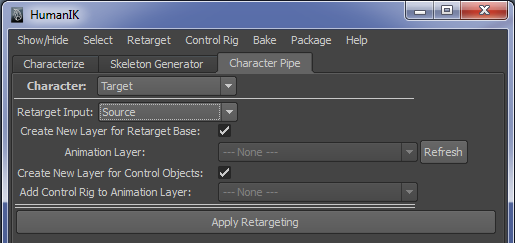
Warning: If an error occurs at this point, it is probably because the joints are either not named correctly or were not mapped correctly, make sure they are selected (and not any other joint)
Viewing Animation
Now you should see that by playing the animation the character moves with the imported animation correctly; you can delete the imported skeleton at this point, or simply select the root joint of the imported skeleton and select Menu → Display → Hide → Hide Selection or (Ctrl-h)
You might need to set the timeline speed to Real-time 24fps, and it will probably be necessary to set the timeslider to the entire duration of the animation (the default is 24 frames, so set it to approximately the amount of frames expected; e.g. 500)
